
Walking through a store the other day, I spied some decorative spiders ($5 apiece!) that had plastic bodies and colorful beaded legs. I really liked them but I have two rules about holiday decor: it has to be homemade and it has to be cheap. (Both components are necessary for the crafting high! And that's what it's all about, right? :) ) Besides, I thought an all-bead spider in black would be much cuter anyway and it was!
You'll need some 20-gauge wire, black seed beads (for the eyes and legs), and two sizes of larger black beads (for the head and body).

For each spider, cut five lengths of wire, about six inches long apiece. This gives you plenty of extra room to work with. String your beads onto the first wire in this order: two seed beads, smaller black bead, larger black bead.

Take the end with the seed beads and feed it back through the large beads. You'll now have two wires coming out the bottom of the largest bead.

Pull the beads taut and clip the wires with just enough room to twist the ends into a loop with your needle-nosed pliers.

For the legs, wrap the remaining four wires once around the wire between the head and body beads.

I used about 25 seed beads for each of the front four legs and about 35 for each of the back four. After stringing the beads on each leg, clip the wire close and curl it into a loop to secure the beads (and to make a cute little spider-foot!)

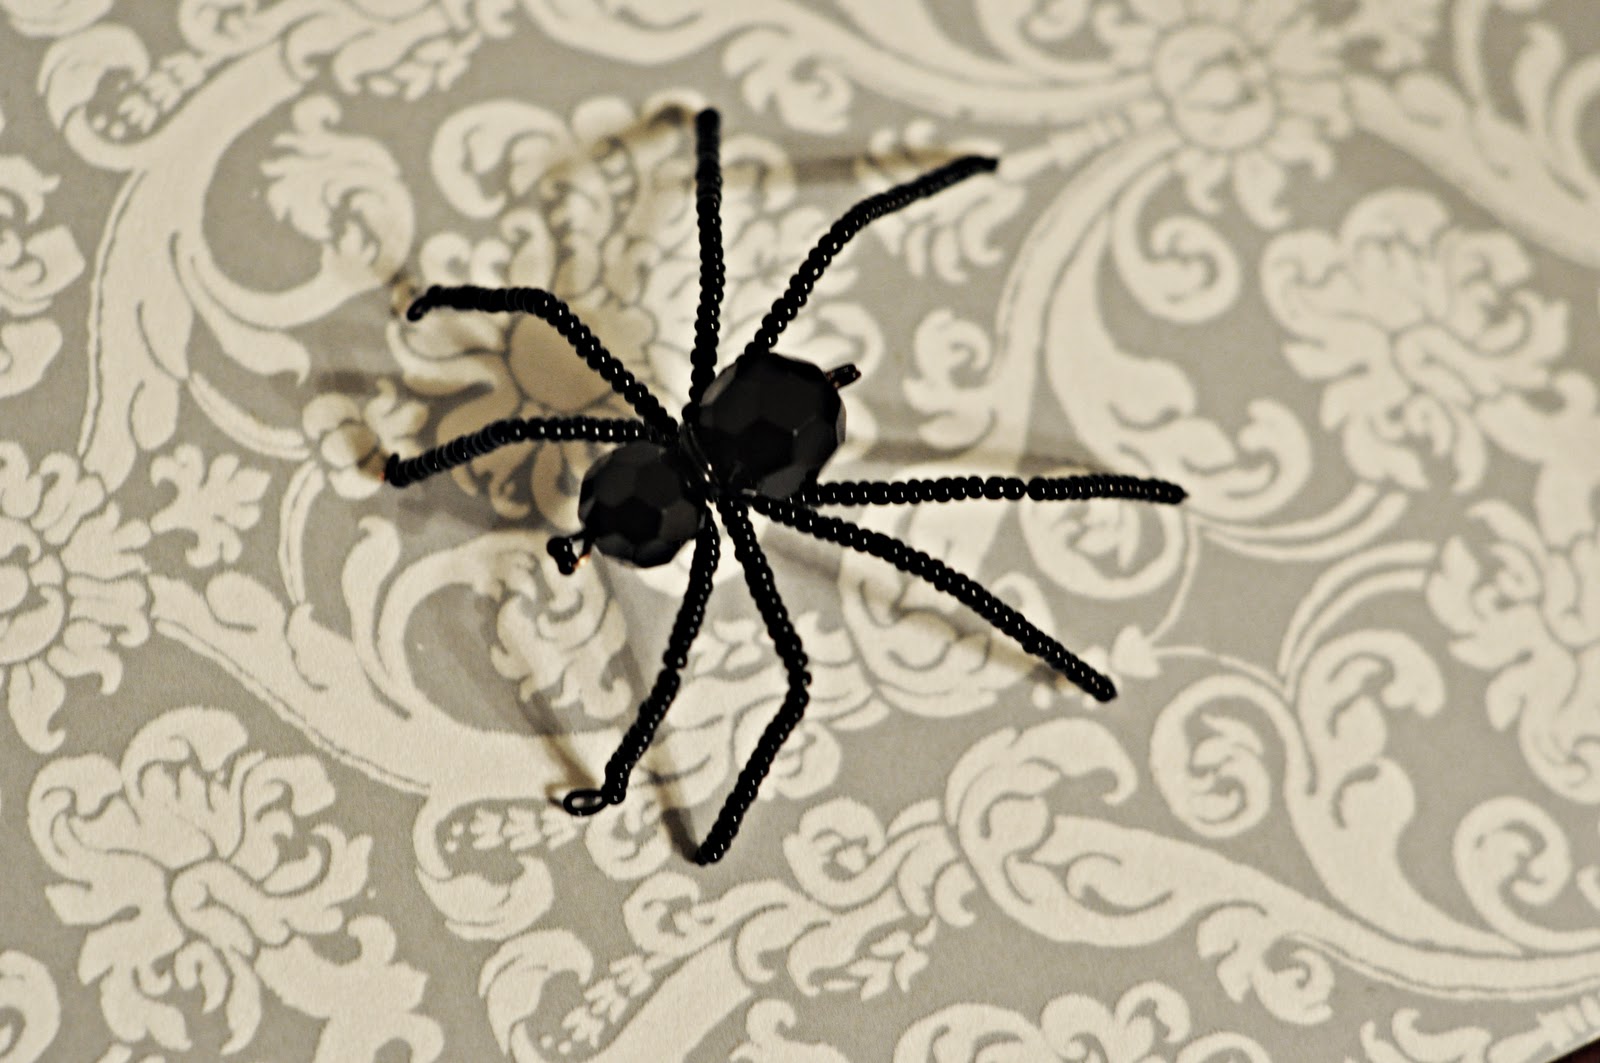
After all eight legs are beaded, bend them into shape and your little bead spider is complete!
And these creepy-crawlies are so versatile! Scatter them about on your mantel,


or contain them in a spooky

You could attach some to magnets, and spookify your refridgerator,

or attach them to some elastic and decorate your daughter's head!


Hooray for spiders! (The kind that aren't real, of course.) :)
Linkies! http://thediyshowoff.blogspot.com/ http://itssoverycheri.com/ http://www.betweennapsontheporch.blogspot.com/ http://www.thegirlcreative.com/ http://makingtheworldcuter.blogspot.com/ http://sumossweetstuff.blogspot.com/ http://madincrafts.blogspot.com/ http://www.craftskeepmesane.blogspot.com/ http://craftomaniac.blogspot.com/ http://cottageinstincts.blogspot.com/ http://eighteen25.blogspot.com/ http://craftingreallyawesomefreethings.blogspot.com/ http://sewcando.blogspot.com/ http://www.skiptomylou.org/ http://www.yesterdayontuesday.com/ http://www.craftedition.blogspot.com/ http://www.luckystarlane.com/ http://www.hopestudios.blogspot.com/ http://imtopsyturvy.com/ http://allthingzrelated.blogspot.com/ http://www.mydeliciousambiguity.com/ http://www.beckieandbrad.blogspot.com/ http://www.thethriftyhome.com/ http://sewmuchado.blogspot.com/ http://733blog.blogspot.com/ http://somedaycrafts.blogspot.com/ http://meandmybucket.blogspot.com/ http://nightowlcrafting.blogspot.com/ http://www.creationsbykara.com/ http://www.bluecricketdesign.net/ http://tatertotsandjello.blogspot.com/ http://alittleknickknack.blogspot.com/ http://alittleknickknack.blogspot.com/ http://www.somewhatsimple.com/ http://firefliesandjellybeans.blogspot.com/ http://www.theshabbychiccottage.net/ http://www.paisleypassions.blogspot.com/ http://lifeaslori.blogspot.com/ http://www.houseofhepworths.com/ http://bec4-beyondthepicketfence.blogspot.com http://funtocraft.blogspot.com/ http://www.fingerprintsonthefridge.com/ http://tidymom.net/ http://thehillsarelivin.blogspot.com/ http://shabbynest.blogspot.com/ http://chiconashoestringdecorating.blogspot.com/ http://itsahodgepodgelife.blogspot.com/ http://froufroudecor.blogspot.com/ http://decormamma.blogspot.com/ http://punkinseedproductions.blogspot.com/ http://tatertotsandjello.blogspot.com http://www.kojodesigns.blogspot.com/ http://becca-homeiswheremystorybegins.blogspot.com/ http://www.justagirlblog.com http://funkyjunkinteriors.blogspot.com/ http://www.bedifferentactnormal.com/ http://nv-craftenvy.blogspot.com/ whilehewasnapping.blogspot.com http://iheartnaptime.blogspot.com/ http://iamonly1woman.blogspot.com/ http://lambaround.blogspot.com/ http://www.bystephanielynn.com/ http://blog.kuzakscloset.com/http://www.domestically-speaking.com/
Very creative! Great idea! Thanks for sharing!
ReplyDeleteYour little one with the spider headband....is toooooo CUTE! LOVE it!
ReplyDeleteAdorable! Both the spiders and the little sweetie:@)
ReplyDeleteI saw them over at Tatertots and Jell-O and absolutely loved them! Thanks for posting the tutorial here - I am going to have to try them!
ReplyDeleteGreat stuff. Thanks for stopping by my blog.
ReplyDeleteLove the spider head band but the 'spider cage' is my absolute fav'! Thanks for the tut'! :)
ReplyDeleteHi Jessica, Thanks for stopping by my blog. Loved your sweet comment. Hope you will come back again and again. I saw this adorable spider tut on Tatertots and Jello, and I loved it. I hope I can make one before Halloween is here. Thanks for the great tut:) Your blog is wonderful and full of great things. I will be back. Thanks for sharing.
ReplyDeleteSo cute!!!
ReplyDeleteWhat a cute idea for the spiders! Thanks for visiting my blog. I'm a new follower... Love your blog!
ReplyDeleteVery cute spiders....but I draw the line for the headband....they're a bit too realistic for me!! Creepily cute! Thanks for the tutorial!
ReplyDeleteThe spiders are adorable! The headband spider is a fabulous idea as well. It almost looks real! Thanks for your nice comment on my blog. :) I'm following.
ReplyDeleteLauren
http://31diy.blogspot.com
Those are adorable! I am kind of liking spiders this year for some reason. Thanks for sharing.
ReplyDeleteThanks for the great idea!
ReplyDeleteShe's precious and I love spider headband!
ReplyDeleteYou are right about the homemade & cheap part of holiday decorating! Those are the prettiest spiders I have ever seen! Thanks for stopping by & leaving such a nice comment!
ReplyDeleteJessica.
ReplyDeleteGreat job. Good quality, easy, understandable and adorable daughter!
Suz
Oh I really like these! Thanks for the tutorial because I am not very good at beading, but I think I could follow this.
ReplyDeleteJessica - What a classy spin on these scary creatures! Love them! I'll be featuring this today - stop by and grab a featured button if you like. Thanks so much for linking to the Sunday Showcase - I greatly appreciate it. Hope you have a wonderful week! ~ Stephanie Lynn
ReplyDeleteThis is really nice, great project, cute little girl she is so adorable modeling.
ReplyDeletehugs,
Maria & Ruth
I love the beaded spiders especially the magnets!
ReplyDeleteOh, so cute! and they don't look too hard to make! Thanks!
ReplyDeleteEeeeep! These are just so cute and so scary all at once, especially the ginormous sparkly spider on the baby!!
ReplyDeleteThis comment has been removed by the author.
ReplyDeleteWe host a witch hat soiree each year {for moms and daughters}...We made these this year, and they were a huge hit! Thanks for sharing!
ReplyDeleteHow very original ! Love your beaded spider - elegant and not at all creepy
ReplyDeleteVery cute!!! I would love to try this myself, although it may be too difficult for my kids to help out. Maybe I can do this one while they use Wikki Stix to make their own. I just ordered some orange and black Wikki Stix for some Halloween projects and got 25% off my order with this coupon code: MB24
ReplyDeletewww.wikkistix.com
I'm absolutely addicted to you blog, I check almost every day to see if you have put a fun new craft up. We have a really bid December coming up with lots of parties that will be in our home. I saw this idea and like it, but am not crazy about the balls. Might you have a better idea for a candy cane wreath?
ReplyDeletehttp://www.bhg.com/videos/m/32071372/candy-cane-wreath.htm
Katie
I love that candy cane wreath... the wheels have started turning... maybe I will do something similar!! :)
ReplyDeleteThese are soooo cute!
ReplyDeleteThey turned out really well.
Thanks for sharing the tutorial.
=)
These are way-hey cute, had to run to Michael's and get the entire ensemble to make my own... thanks for sharing your creativity :)
ReplyDeleteOh, my how adorable is that! You are definitely creative! I have to try out the spider! love that idea a lot.
ReplyDeleteI am your new follower. You can follow me back at http://showmemama.com. Make sure you leave a comment so I know you visited.
Have a great weekend
ShowMeMama
These are FAN tastic! I love them. I wanted to try to make some like this, but never took the time to figure it out. Now I don't have to! You're a gem!
ReplyDeletexoxo
Amy
Oh my goodness! That spider looks too real to put on my fridge or my daughter! LOL! I might accidentally smack her upside the head LOL!
ReplyDeleteThe spider is cool though .... as far as spiders go! Thanks for planting your creative seeds at Plant a Punkin Seed Party.
Kristi
Punkin Seed Productions
darling! I am going to feature these today (halloween)
ReplyDeleteLove this! Thanks for the tutorial. Your blog is terrific. One of my new favorites.
ReplyDeleteThis is absolutely amazing. If I wasn't TERRIFIED of spiders I might do it. But this is real looking enough that I got the chills just looking at it! Eeeek! Thanks for linking up to Topsy Turvy Tuesday's!
ReplyDeleteI'm writing a round up style post for TLC's Parentables.com website and would love to share your halloween craft project.
ReplyDeleteMay I have permission to use a photo and link back to your post?
Sincerely,
Brittany aka Pretty Handy Girl
Hello...I hope it's OK that I will be linking this post to my blog today, as I made your spiders into a ring. Thank you so much for such a wonderful (and creative) tutorial! Your blog rocks! :)
ReplyDeletevivianluna.blogspot.com
Very cute ! ! ! Thank you for sharing your talent.
ReplyDeleteWow, this spider jewelry looks so sweet! I also like spiders. And i think you should post this photos on instagram, where al arge amount of users could see it. By the way you can buy instagram followers to quickly increase their number.
ReplyDeleteVery creative! Great idea! Thanks for sharing!
ReplyDeleteafrican waist beads